The first time I attempted a Grasshopper Pie, it was an absolute disaster. The crust was crumbly, the filling was strangely soupy, and the mint flavor tasted more like toothpaste than a refreshing dessert. It was a disheartening flop, especially since I’d always been captivated by its vibrant green hue and the promise of a cool, creamy indulgence. That initial failure, however, ignited a fierce determination in me. I spent months, no, *years*, meticulously experimenting with every single component: different chocolate cookie brands, various forms of mint, gelatin ratios, and chilling techniques. What I finally discovered, after countless trials and tribulations, was that the true secret lies not just in the ingredients themselves, but in their *quality* and, crucially, the *temperature management* throughout the entire process. Maintaining precise temperatures, especially when incorporating the liqueurs and chilling the pie, ensures that perfect, sliceable consistency and a balanced flavor that sings with cool mint and rich chocolate, rather than screaming artificial.
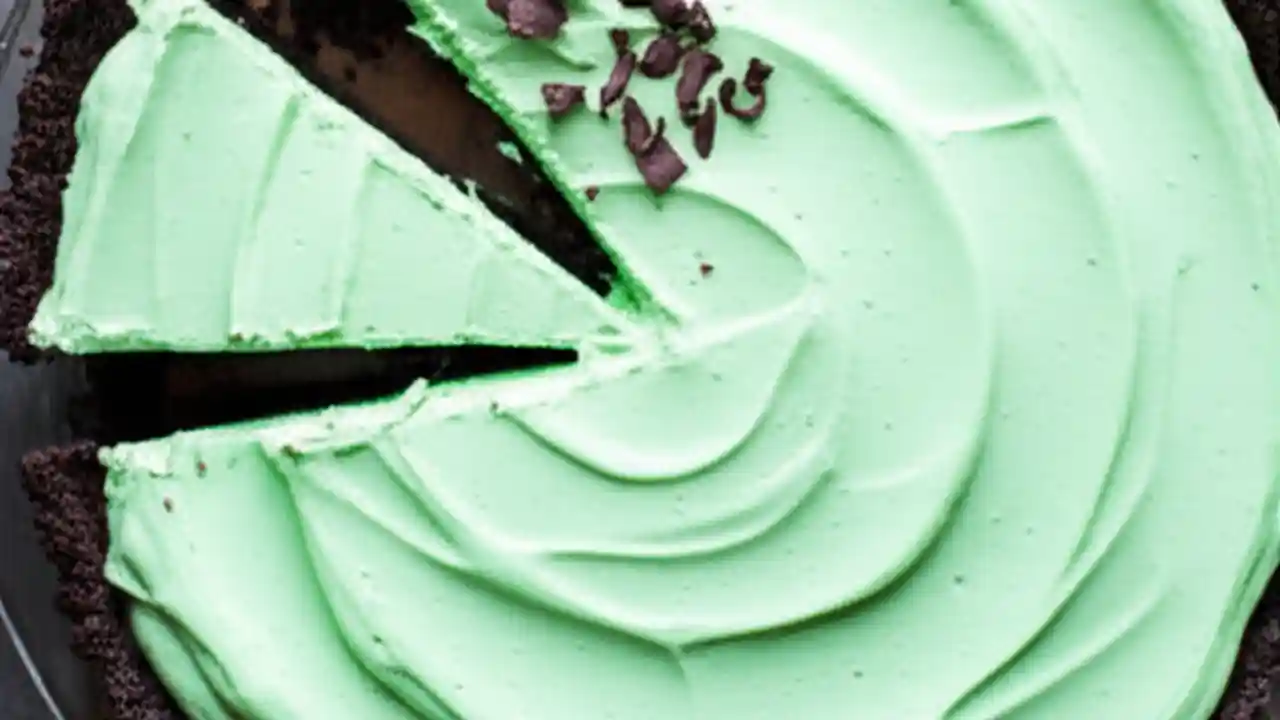
This isn’t just another Grasshopper Pie recipe; it’s the culmination of my journey to transform a classic into an absolute masterpiece. I promise you a pie with a deeply rich, yet perfectly crisp chocolate cookie crust that never gets soggy, a filling that’s ethereally light yet holds its shape beautifully, and a mint-chocolate flavor profile that is refreshingly authentic, never overpowering. Forget those overly sweet, gelatinous versions you might remember from childhood diners. This recipe delivers a sophisticated, balanced dessert that will impress even the most discerning palates, making it a showstopper for any occasion, from a casual family dinner to a festive holiday gathering. Get ready to experience the perfect blend of cool, creamy mint and decadent chocolate, all in one glorious slice.
Table of Contents
Family Feedback
“James, I made this last night for our weekly game night, and it was gone in minutes! I’ve always loved Grasshopper Pie, but yours is just… different. The mint is so fresh and not at all artificial, and the crust has this amazing deep chocolate flavor without being too sweet. My husband, who usually just picks at desserts, had two slices! It’s officially a new family favorite.”
“This pie is ridiculously good. I brought it to a potluck, and everyone kept asking for the recipe. I was worried it might be too boozy, but the balance of the crème de menthe and crème de cacao is absolutely spot-on. It’s so smooth and creamy, and the way it just melts in your mouth is divine. You’ve truly mastered this one!”
Recipe Card
| Course | Dessert, Pie, Chilled Dessert |
| Cuisine | American |
| Featuring | Mint, Chocolate, No-Bake, Creamy, Festive, Classic |
| Prep Time | 30 minutes |
| Cook Time | 0 minutes |
| Total Time | 3 hours 30 minutes |
| Servings | 8 servings |
| Calories | 480 kcal |
| Author | James |
Ingredients
- 1 ½ cups chocolate wafer crumbs (such as Nabisco Famous Chocolate Wafers, about 25-30 cookies)
- ¼ cup granulated sugar
- ½ cup unsalted butter, melted
- 1 ½ teaspoons unflavored gelatin powder (such as Knox)
- ¼ cup cold water
- 1 ½ cups heavy cream, very cold
- ½ cup powdered sugar, sifted
- ½ cup green crème de menthe liqueur (high-quality, like Bols or DeKuyper)
- ¼ cup white crème de cacao liqueur (high-quality)
- 1 teaspoon pure vanilla extract
- Pinch of fine sea salt
- For Garnish (Optional): Shaved chocolate, fresh mint sprigs, or whipped cream
Key Ingredient Notes: The quality of your ingredients significantly impacts the final taste and texture of your Grasshopper Pie. For the chocolate wafer crumbs, I highly recommend using Nabisco Famous Chocolate Wafers. They provide a deep, rich chocolate flavor that complements the mint perfectly, and their fine texture creates an ideal, non-soggy crust. Avoid generic chocolate cookies if possible, as they can sometimes be too sweet or have an inferior texture. When it comes to the liqueurs—crème de menthe and crème de cacao—invest in reputable brands. A high-quality crème de menthe will offer a clean, natural mint flavor without any artificial or syrupy undertones. Similarly, a good crème de cacao provides a genuine chocolate essence, contributing to the pie’s overall depth. These liqueurs are not just for flavor; their alcohol content helps to slightly tenderize the filling, contributing to its smooth, melt-in-your-mouth consistency. For the gelatin, ensure it’s unflavored and relatively fresh; old gelatin may not set properly. Lastly, using very cold heavy cream is non-negotiable for achieving perfectly whipped cream that holds its volume and creates an airy, light filling. If your cream isn’t cold enough, it simply won’t whip to the desired stiff peaks, which is crucial for the pie’s structure.
Instructions
- Prepare the Crust: In a medium bowl, combine the chocolate wafer crumbs and granulated sugar. Pour in the melted unsalted butter and mix thoroughly with a fork until all the crumbs are evenly moistened. The mixture should resemble wet sand.
- Form the Crust: Press the crumb mixture firmly and evenly into the bottom and up the sides of a 9-inch pie plate. Use the bottom of a flat glass or your knuckles to compact the crumbs tightly. This step is crucial for a sturdy crust that won’t fall apart when sliced.
- Chill the Crust: Place the prepared crust in the refrigerator for at least 30 minutes while you prepare the filling. This chilling time helps the butter solidify, binding the crumbs together and preventing a soggy crust.
- Bloom the Gelatin: In a small, heatproof bowl, sprinkle the unflavored gelatin powder over the ¼ cup of cold water. Let it sit for 5-10 minutes, allowing the gelatin to “bloom” or soften. It will absorb the water and become thick and translucent.
- Dissolve the Gelatin: Once bloomed, place the bowl of gelatin over a small saucepan of simmering water (creating a double boiler) or microwave it for 10-15 seconds, stirring until the gelatin is completely dissolved and clear, with no granules remaining. Set aside to cool slightly but ensure it remains liquid. It’s important that it’s warm, not hot, when added to the cream mixture.
- Whip the Cream: In a large, very cold mixing bowl (preferably chilled in the freezer for 10-15 minutes beforehand), pour the very cold heavy cream. Using an electric mixer (stand mixer with whisk attachment or handheld mixer), begin whipping the cream on medium-high speed.
- Add Sweetener and Flavorings: As the cream starts to thicken and soft peaks form (this usually takes 2-3 minutes), gradually add the sifted powdered sugar, green crème de menthe, white crème de cacao, pure vanilla extract, and a pinch of fine sea salt. Continue whipping until stiff peaks form. The cream should be thick and hold its shape when the whisk is lifted, but avoid over-whipping, which can make it grainy.
- Incorporate Gelatin: With the mixer on low speed, slowly pour the slightly cooled, dissolved gelatin into the whipped cream mixture. Increase the speed to medium-high and whip for another 30-60 seconds, just until the gelatin is fully incorporated and the mixture is light and uniform. Do not overmix once gelatin is added.
- Assemble the Pie: Retrieve the chilled crust from the refrigerator. Carefully spoon the Grasshopper Pie filling into the prepared crust, smoothing the top with an offset spatula or the back of a spoon. Create a slight swirl or dome for an appealing presentation.
- Chill the Pie: Place the pie back into the refrigerator and chill for a minimum of 3 hours, but ideally 4-6 hours, or even overnight. This extended chilling time is absolutely essential for the pie to set completely and achieve its perfect firm, yet creamy, texture. Rushing this step will result in a runny pie.
- Serve and Garnish: Once thoroughly chilled and set, slice the pie with a sharp knife (running it under hot water and wiping it clean between slices can help achieve clean cuts). Garnish each slice with shaved chocolate, fresh mint sprigs, or a dollop of additional whipped cream if desired.
Secrets to the Perfect Grasshopper Pie
- The Unsung Hero: Quality Chocolate Wafers for the Crust. Many recipes suggest using Oreos, but I’ve found that Nabisco Famous Chocolate Wafers are the true game-changer for the crust. Unlike Oreos, they lack the creamy filling, which can introduce too much moisture and sweetness, leading to a soggy crust over time. The Famous Wafers provide a deeper, more sophisticated chocolate flavor that perfectly balances the mint, and their fine, dry crumb makes for an incredibly crisp and sturdy base. My mistake early on was using a generic chocolate cookie with a high fat content, which resulted in a greasy, crumbly crust that refused to hold its shape when sliced. Always opt for the dry, bitter chocolate wafers for a superior foundation.
- Precision in Liqueur Integration and Temperature. The quality and temperature of your crème de menthe and crème de cacao are paramount. Subpar liqueurs can introduce an artificial, syrupy taste that ruins the delicate balance. Invest in good brands like Bols or DeKuyper. More critically, ensure these liqueurs are at a cool room temperature, not straight from the fridge or warmed. If they are too cold, they can shock the whipped cream, causing it to deflate. If they are too warm, they might melt the cream. My early experiments often resulted in a deflated, denser filling because I didn’t pay attention to the liqueur’s temperature, leading to a loss of the essential airy texture.
- Gelatin’s Golden Rule: Bloom and Dissolve, Then Cool. Gelatin is the structural backbone of this no-bake pie. The “blooming” step (sprinkling it over cold water and letting it sit) is non-negotiable; it allows the gelatin granules to fully hydrate. Then, dissolving it *completely* over a gentle heat ensures no grainy bits in your pie. However, the most critical part is letting the dissolved gelatin cool slightly before incorporating it into the whipped cream. If it’s too hot, it will melt your carefully whipped cream, turning your airy mixture into a soup. I’ve learned this the hard way, ending up with a runny pie that never set, simply because I was impatient and added hot gelatin. It should be warm to the touch, but not hot, ensuring it blends seamlessly without compromising the cream’s structure.
- The Art of the Chill: Patience is Your Best Ingredient. While 3 hours of chilling is the minimum, aiming for 4-6 hours, or even better, overnight, makes an enormous difference. This extended chilling time allows the gelatin to fully set, the flavors to meld, and the pie to firm up to that perfect sliceable consistency. Cutting the pie too soon is the most common reason for a messy, unappealing slice. The texture won’t be as firm or as clean, and the subtle mint notes won’t have fully developed. Trust me, the wait is worth it for a truly perfect slice that holds its shape beautifully and melts deliciously in your mouth.
- Whipping Cream to Perfection, Not Past It. Achieving stiff peaks with your heavy cream is crucial for the pie’s light and airy texture. Start with very cold cream and a chilled bowl and whisk. Whip on medium-high speed until the cream holds its shape firmly when the whisk is lifted. However, stop *just* before it becomes grainy or separates. Over-whipped cream introduces too much air and can lead to a dry, crumbly texture in the filling. The goal is a velvety, smooth consistency that still has body and loft. This delicate balance is what gives the Grasshopper Pie its signature creamy mouthfeel.
Recipe Inspiration & Creative Variations
This “Perfect Grasshopper Pie” is a fantastic base for creativity. For a more intense chocolate experience, consider adding 1/4 cup of mini chocolate chips or finely chopped dark chocolate to the filling along with the liqueurs. For a “Boozy Adult” version, you can increase the crème de menthe and crème de cacao by 1-2 tablespoons each, or add a splash of Irish cream liqueur for an even richer, more complex flavor profile. If you’re looking for a kid-friendly option or prefer to omit alcohol, you can substitute the liqueurs with 1 tablespoon of pure mint extract and 1 tablespoon of chocolate extract, adding a few drops of green food coloring for that classic hue. For a refreshing twist, try incorporating finely chopped fresh mint leaves (about 2 tablespoons) into the whipped cream, infusing it with an even more natural mint essence. You can also experiment with different crusts, such as a traditional graham cracker crust for a less intense chocolate base, or even a gluten-free cookie crust for dietary needs. The possibilities are endless once you master the core technique!
Storage Methods
Proper storage is essential to maintain the quality and texture of your Perfect Grasshopper Pie. For short-term storage, cover the pie loosely with plastic wrap or aluminum foil and refrigerate for up to 3-4 days. Ensure it’s not sealed too tightly, as condensation can form and make the crust soggy. If you need to store it longer, or if you’re making it ahead for a special occasion, this pie freezes beautifully. To freeze, place the entire pie (uncovered) in the freezer until solid (about 2-3 hours). Once frozen solid, wrap it tightly in several layers of plastic wrap, followed by a layer of aluminum foil. Label with the date. It can be stored in the freezer for up to 1 month. To serve from frozen, transfer the pie to the refrigerator and let it thaw for 2-3 hours, or until it reaches your desired consistency. Avoid thawing at room temperature, as this can compromise the texture and lead to a softer, less firm pie. Always keep this pie chilled; it does not hold up well at room temperature for extended periods.
Nutrition Facts (Per Serving)
| Calories | Fat | Carbs | Protein |
|---|---|---|---|
| 480 kcal | 32 g | 38 g | 4 g |
Please note that nutrition information is an estimate and can vary based on the specific ingredients used and portion sizes.
Frequently Asked Questions
Why is my Grasshopper Pie not setting or too runny?
The most common reasons for a runny Grasshopper Pie are issues with the gelatin or insufficient chilling time. Ensure your gelatin is properly bloomed in cold water and then fully dissolved without any granules remaining. It’s crucial that the dissolved gelatin is allowed to cool slightly before being incorporated into the whipped cream; if it’s too hot, it will melt the cream and prevent setting. Additionally, this pie requires a minimum of 3 hours of chilling, but 4-6 hours or even overnight is highly recommended for the gelatin to fully activate and the pie to firm up to its ideal, sliceable consistency.
Can I make Grasshopper Pie without alcohol?
Yes, you absolutely can! To make a non-alcoholic version of this Grasshopper Pie, simply substitute the green crème de menthe with 1 tablespoon of pure mint extract and the white crème de cacao with 1 tablespoon of pure chocolate extract. You may want to add a few drops of green food coloring to achieve the signature vibrant green hue of the pie. The flavor will still be wonderfully minty and chocolatey, just without the alcoholic kick, making it suitable for all ages.
What type of chocolate wafers are best for the crust?
For the absolute best crust, I highly recommend using Nabisco Famous Chocolate Wafers. These dry, crisp wafers provide a deep, unsweetened chocolate flavor that perfectly complements the mint filling and creates a firm, non-soggy base. Unlike sandwich cookies, they don’t have a creamy filling, which can introduce excess moisture and sweetness that can compromise the crust’s texture and overall balance of the pie. Their fine crumb also allows for a very compact and stable crust.
How long does Grasshopper Pie last in the refrigerator?
When properly stored, your Perfect Grasshopper Pie will last beautifully in the refrigerator for up to 3 to 4 days. To ensure its freshness and prevent it from absorbing refrigerator odors, make sure to cover it loosely with plastic wrap or aluminum foil. This helps maintain its creamy texture and prevents the crust from becoming too soft. For longer storage, the pie can be frozen for up to one month, making it an excellent make-ahead dessert option.